RealTalk by KCM Overview
RealTalk allows you to easily browse pre-written scripts, edit your scripts, or create your own! Once you have your script ready to go, you can easily record and share directly from your Member Area.
If you’d like to record your videos on a mobile device, you can do so in the KCM Mobile app! To learn more about using RealTalk in your Mobile App, click here!
If you're wondering whether to record on Desktop or Mobile, we've got you covered! Take a look at this helpful video from the Learning Center to help you decide!
Creating a Script from Scratch
Using a Pre-Written Script:
You can choose the script you would like to record by starting in your Desktop KCM Member Area. You'll have easy access at the top of the page to record the latest scripts or browse current scripts. Click "See All" in the "Scripts" box to view all available scripts.
.gif?width=678&height=381&name=RT%207-8%20GIF%201%20(correct).gif)
Creating a Script from Scratch:
From the RealTalk page, select "Create Now" under "Create Your Own Script."
Start From Scratch: Add text within the text block to get started! Then use the Plus icon to add additional elements to your script. Choose from Image, Text, or AI Wizard to continue creating your script, and save when it is complete.
Always review AI-generated copy for accuracy and bias before recording.

Use a KCM Template: Select a Template that pulls in your Local data and visuals and creates a written summary of the visual using the AI Wizard (beta). Note: Always review AI-generated copy for accuracy and bias before recording.

Note: Scripts you create or edit will be found under "My Scripts" on the Scripts page.
Recording Your Video:
Tip: Record a few videos at a time, then access your recordings when you’re ready to share!

- To start recording your video, select the red "Record" button on the right hand side of the script.
- Once your script is ready to record, select the “Record” button or press the spacebar on your computer. This page will have a few options for you to customize your recording and video set-up.
- You'll see your teleprompter over your video preview. You can move this anywhere you'd like and you'll also be able to adjust the speed and size of your text. You'll then be able to click "Preview" to practice your Script before recording!
- The "Format" button below your preview will allow you to select how you would like to record your video; 9:16 for Portrait and 16:9 for Landscape.
- The “Background” option allows you to choose no background, a Blur background, or "More Options" which will open RealTalk Settings.
Tip: Reduce backlighting and minimize movement when using the blur or background options for best results. Using a background image with different colors than your clothes when recording will help you stand out more in your video.

- The "Settings" button will allow you to choose a few options:
- Teleprompter
- Font Size: Use slider to change the size of your font
- Scroll Speed: Adjusts the speed of your Teleprompter
- Teleprompter Transparency: changes how dark or transparent the Teleprompter appears.
- Bold Text: Toggle on or off for bolded text on the Teleprompter
- Recording
- Auto Stop: Stops recording automatically at the end of your script
- Countdown Timer: Adjust the timer before your video starts recording
- Video:
- Mirror- This flips your video horizontally, making text and movements look reversed, like a reflection in a mirror.
- Backgrounds
- Performance:
- High Quality- allows your videos to look better
- Fast Performance- allows your videos to run smoother on some devices
- Performance:
- Teleprompter
-
-
-
- Background Type
- None- no virtual background at all
- Blurred-blurs your background
- Saved Image- You can choose a virtual background for all your RealTalk videos by selecting this option or by clicking the "Upload Background" button to add your own image.
- Script Image Background- If any of your uploaded images are smaller than the screen, a background color selected here will automatically be displayed behind the image.
- Background Type
-
-
- When you're done recording, you can click the "Stop" button to the right or tap the spacebar on your computer. If you need to record again, you can select "Start Over" and start another take.
Any Scripts that have recordings will have a film strip icon ![]() on the bottom right corner of the script tile in your library.
on the bottom right corner of the script tile in your library.
Review Your Video
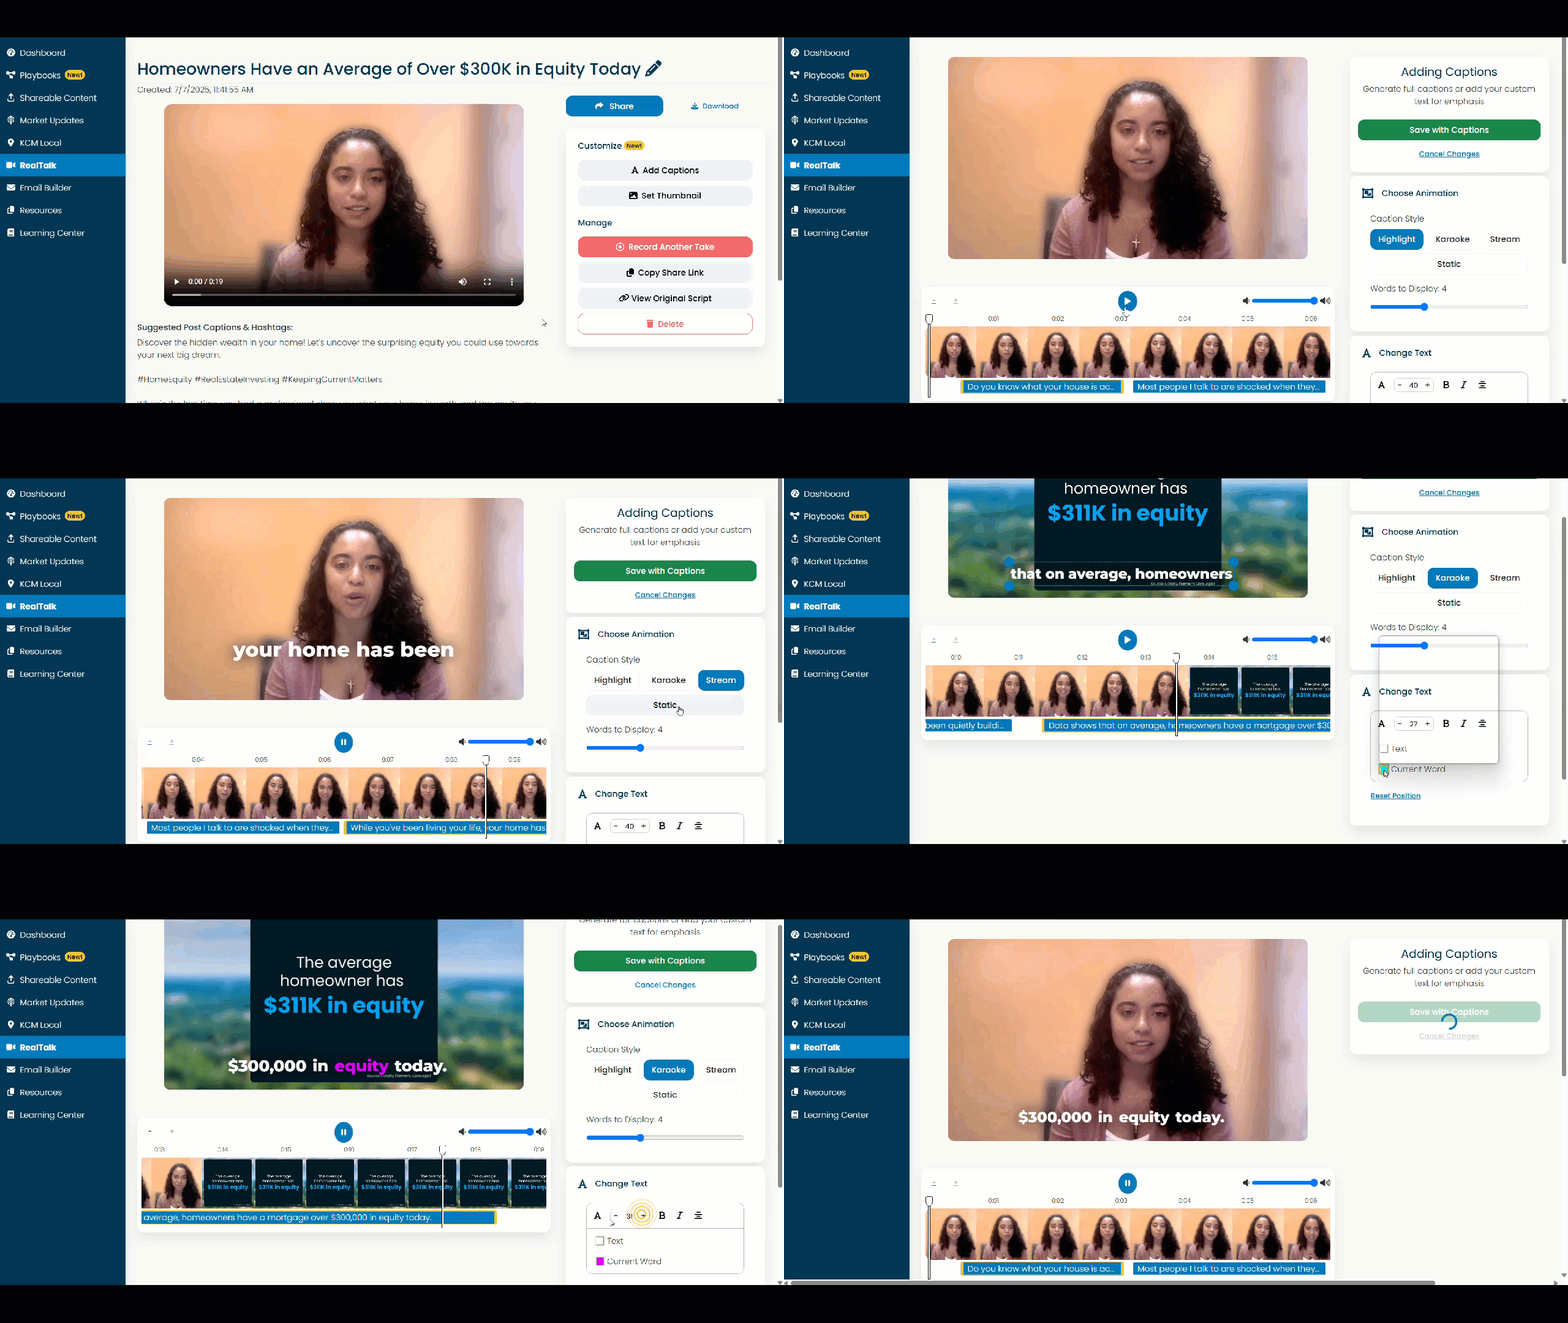
Once your video is recorded, you can select “Review” to watch your recording and add Dynamic Captions, Thumbnail, or Caption for your video.
Add Dynamic Captions

-
- Captions – Customize your captions by adjusting the font, color, size, and placement to ensure readability and match your video's style. You can also move the captions wherever you'd like on your video, just drag to reposition and tweak for the perfect look.
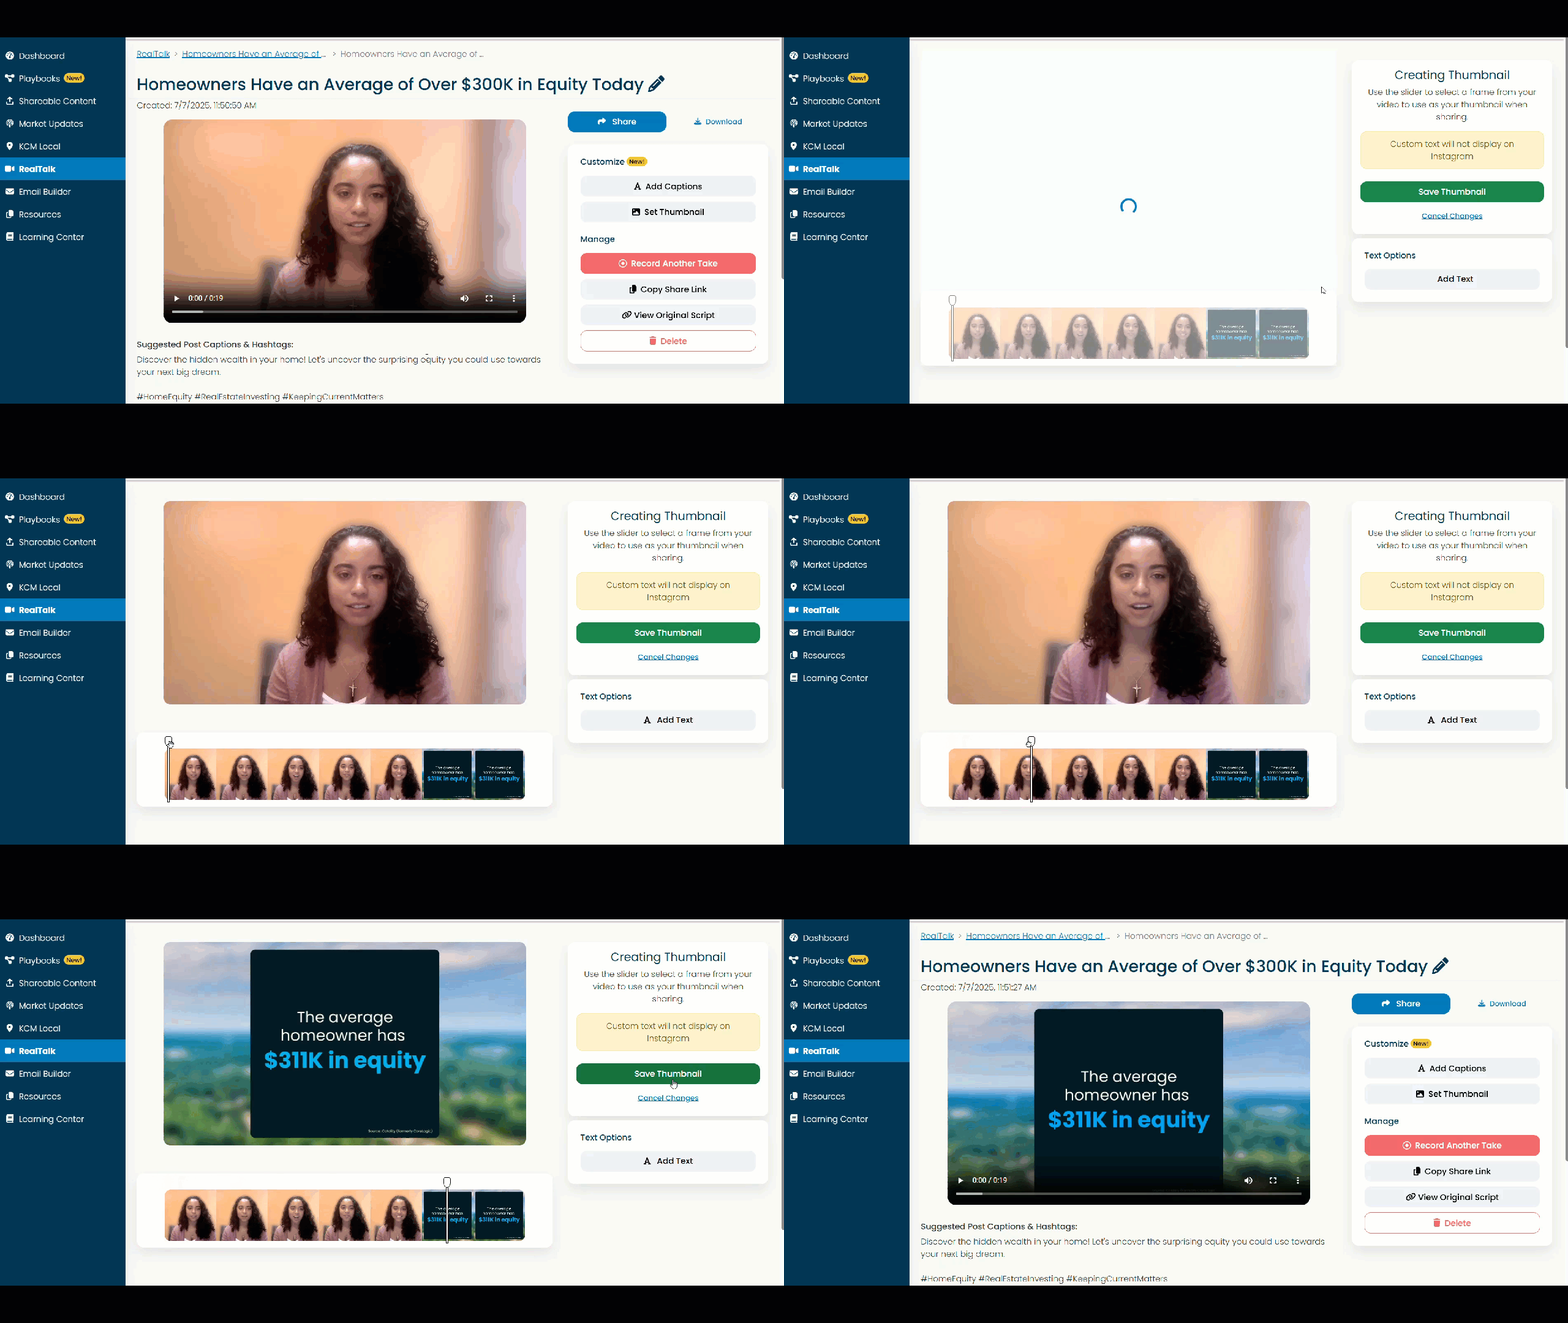
Add Thumbnail Image

-
- Thumbnail – Select a specific moment in your video to set as your thumbnail, and then add your desired text. You can easily click and drag the text box to position it anywhere on your thumbnail.
Videos with Thumbnails shared to Instagram will not appear with text on the image.
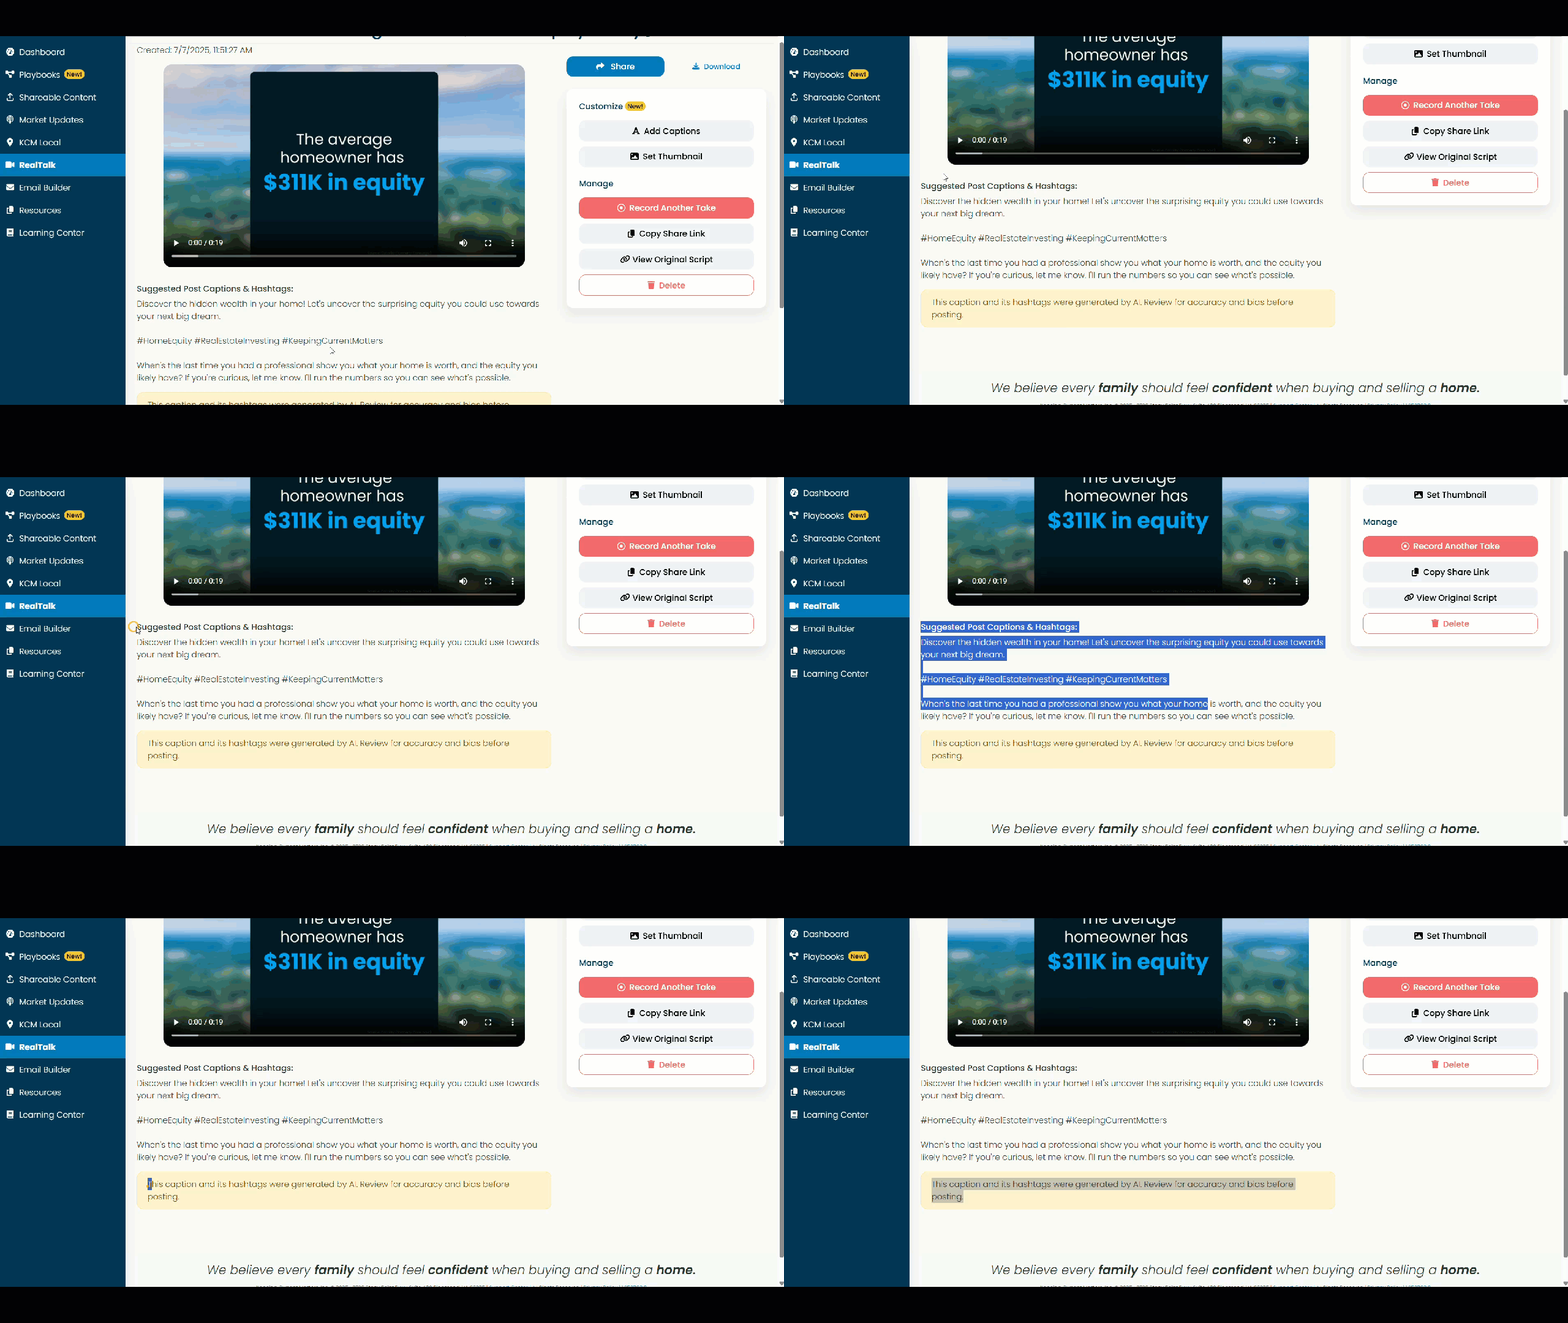
Pre-Written Captions and Hashtags

- Pre-Written Caption + Hashtags –Review the automatically generated caption and hashtags for your video, which you can easily incorporate into your social media posts.
Always review AI-generated copy for accuracy and bias before sharing.
Share Your Video

- You can share your videos immediately after recording by using the "Share" button
- You can use the social media buttons to share your video to your social platforms.
- You can also select the “Email” button to easily copy and paste your video into an email.
- Copy for Email: This option will copy a gif of your video, along with a summary and a link to watch your video. Once you select this button, simply paste into your email!
- Create Email: This option will copy your video gif and summary within a branded template that you can copy and paste into your email.
- You can also easily share a link to your video by selecting “Copy Share Link.” This will link to your video on your own branded Homepage!
- You can also go to "Recent Recordings" at the bottom of the RealTalk page to see your saved videos and share from there!
Accessing Your Recordings

- All of your Saved Videos will appear in "Recent Recordings" on the RealTalk landing page of your Member Area.
If you have any further questions, feel free to contact our Support Team on this page, and we'll be happy to help!
